Using Product Kits
Kit is a product type that allows you to group several items into another single item that has its own inventory.
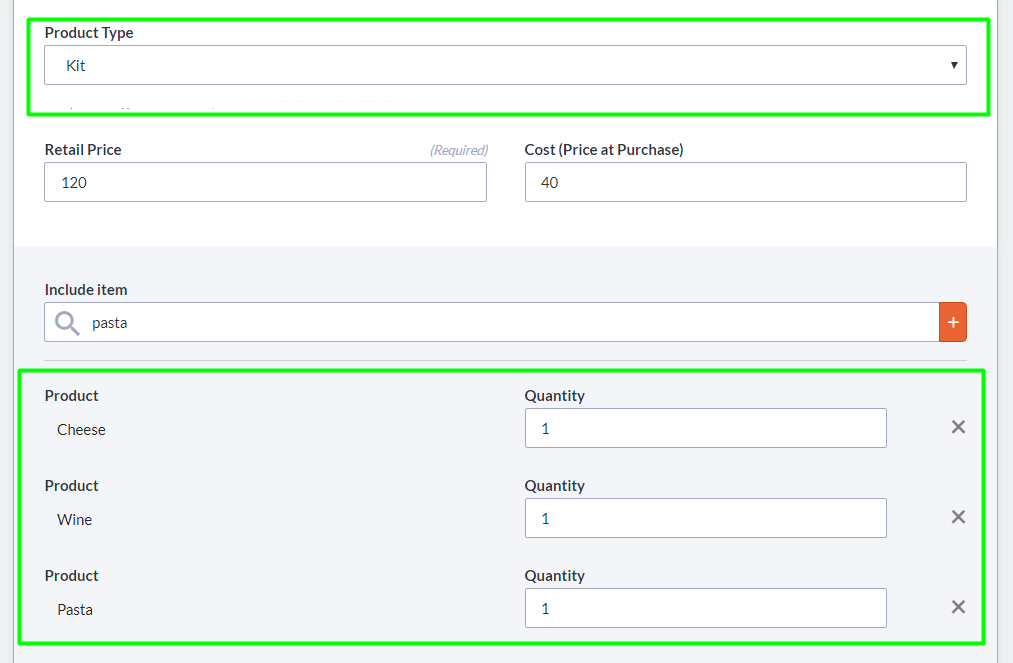
One sample application for this feature are holiday gift baskets, where you physically put select items like cheese, wine and pasta into a basket and wrap it in cellophane. You know how many baskets you have produced so you can count its inventory.
Step 1:
Go to Stockroom, then click the ADD PRODUCT button.

Step 2:
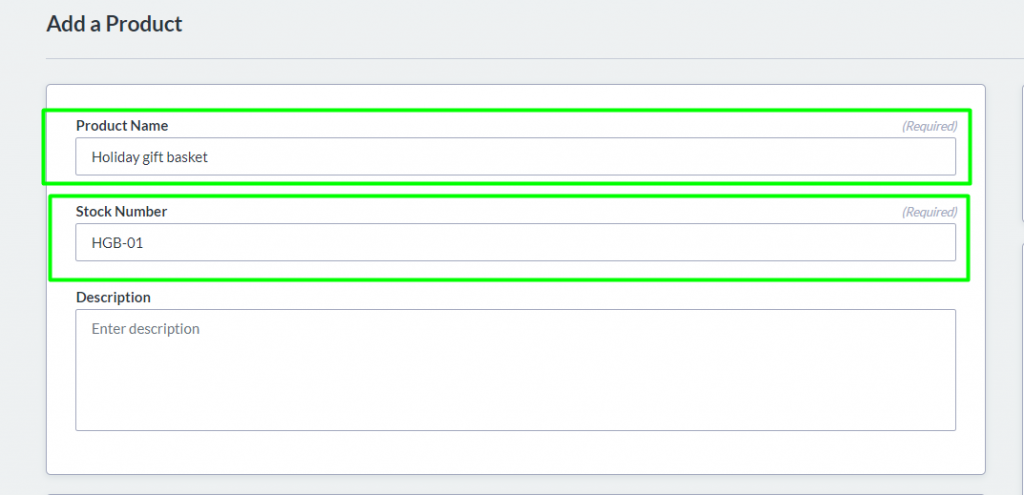
Fill-up all required fields such as:
Product Name, Stock Number and Retail Price.

Step 3:
Select Kit as the Product Type and include all the product you want to group into one.

*The items you want to add to the kit should already exist in Stockroom.
Step 4:
You may fill up the following optional fields to make your product kit more detailed.
Description – describes the item in paragraph form. You can add details such as item size, color, supplier and more.
Cost – the estimated cost of the item when you purchase it from your supplier.
Minimum/Maximum Quantity – just type the min/max values of the item’s inventory. We will add reports that will correspond to this later on.
Add Barcodes – type the barcodes that correspond to the product, so you can scan the item with a barcode scanner while selling. If the item does not have a barcode, you can type any series of numbers here so you can print a barcode label for it using our barcode printing feature.
Add Tags – these are words that describe what the item is or how it looks like. You can use tags as categories, or a way to sort your items. (The tags feature is only available if you are a premium user).
Step 5:
You may also upload a photo for your item. Click the Choose File to upload a picture that represents your product kit. The maximum size allowed for the picture is only 64kb.

Step 6:
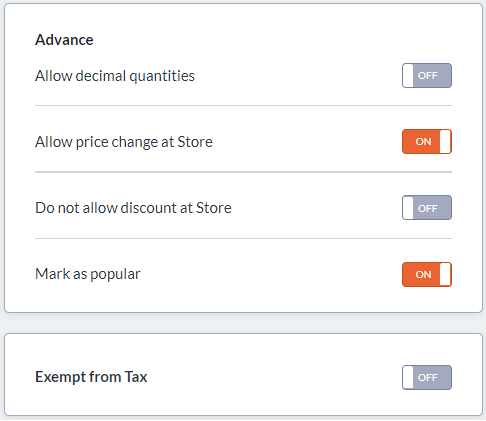
There is also some Advanced Settings where you can turn on/off the following:

Step 7:
Once you finalize all the details, click SAVE button to create the Product Kit.
Last updated